 |
||||||||||||
| Home |
|
Products For Sale |
FAQs, Tips, Manuals |
Referral List |
|
Photo Gallery |
|
Links |
|
Contact Us |
|
|
||||||||||||||||||
Power Supply The below pictures show how to remove the power supply from the NEC PG series of projectors. The power supply can be removed while the set is on the ceiling, but keep in mind that it weighs about 10 lbs, so you have some weight to contend with once the last screw is loosened.
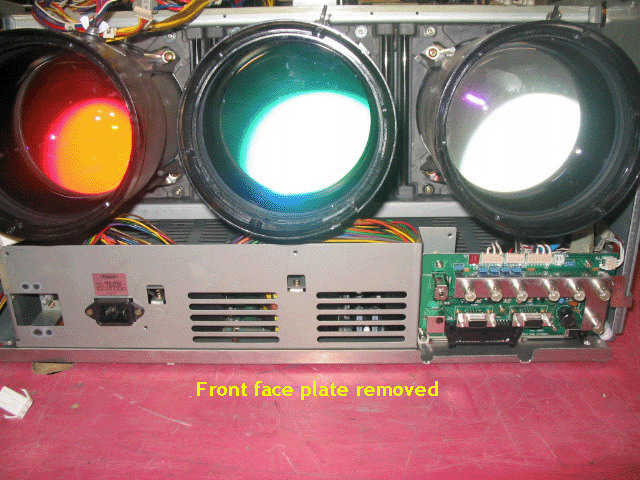
Above is what you see when you remove the lens cover from the NEC. The power supply taunts you from behind the plastic cover and the input board is mounted to the power supply chassis. Take off the front plastic panel, and you get the following:
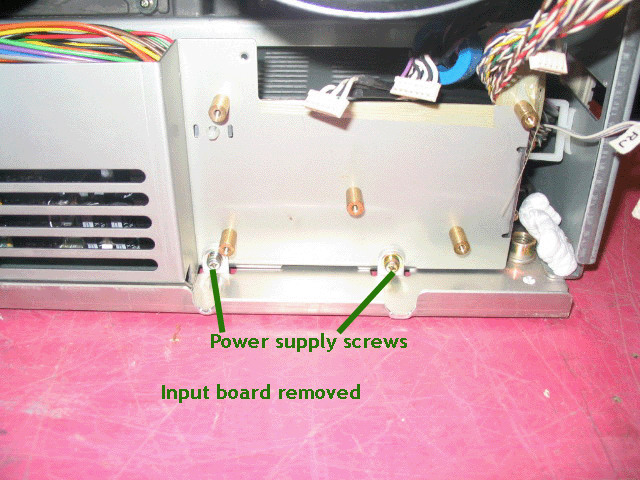
You will now see the power supply, and the input board can be unscrewed and disconnected.
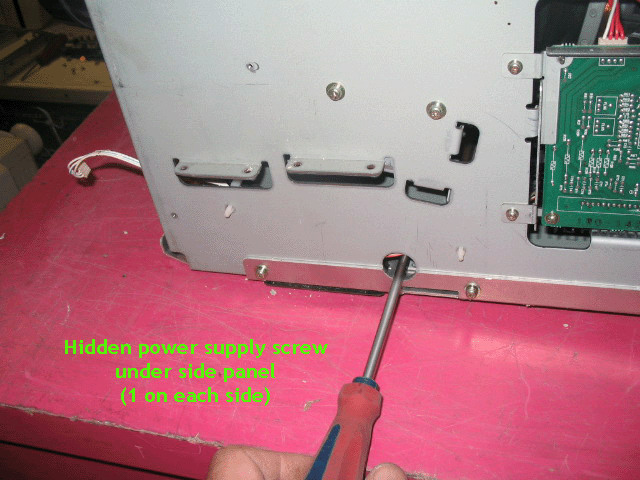
There are two power supply screws that you need to remove at the front of the set, and one more is on the left side of the power supply. There are two hidden screws behind the side plastic case strips. Take off the side panel strips and locate the screw holes that hold the back of the power supply in place on the right and left hand side of the sets.
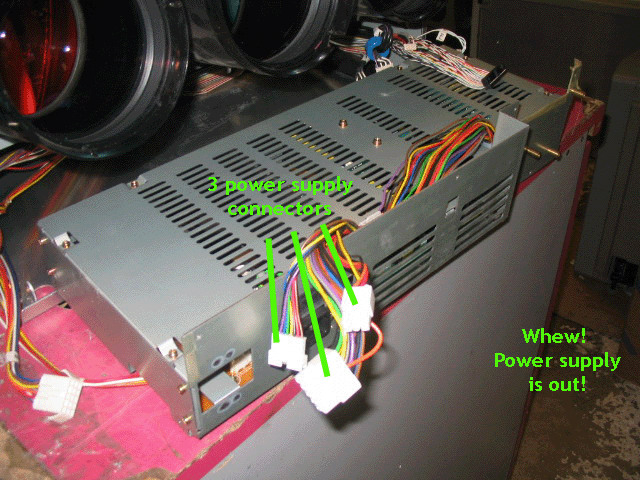
Once these two screws are removed, the power supply will now be loose and can be slid out from under the tubes.
Disconnect the three white connectors that feed the power to the set, and you’re
done.
|
|
|||||||||||||||||
 NEC PG Series

© Copyright CurtPalme.com. All Rights Reserved. |