 |
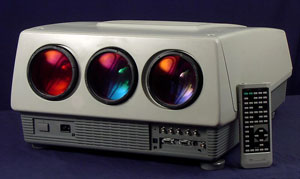
 NEC PG Series NEC PG Series
Mechanical Setup Procedure
|
(Page 1)
|
Page: 1 2
3 4
5 6
7 8 |
This section describes how to perform the basic initial mechanical set-up on
the NEC PG series
projectors. It applies to the NEC CRT projector series PG6000/9000 to 6200/9200
unless otherwise
noted in this procedure.
This document is a work in progress and can be freely updated as needed.
Written by Tinman, edited and revised by Feathers.
Photos by Andreas F. Bobak.
The reason for performing a complete “from scratch” setup on a PG projector is
pretty basic. Most
of these units now available in the surplus market have at one time or another
been tinkered with,
adjusted, moved, and even modified to suit a particular application. During this
time the unit's basic
alignment is often lost. A poorly aligned projector causes excessive stress on
the electronics
noticeable convergence drift, excess heat, and at some point, failure.
So, you just acquired your first PG. Now what? Well, the obvious thing is to
download or purchase
a set-up manual. A manual is always good to have, but it is not written to be an
easy guide for the
new projector owner. It is written for the more advanced user that already
understands the use of all
the various adjustments and controls, and it glances over the basic setup. It
falls short of explaining
“why” certain adjustments should be done. This document is an attempt to explain
these points in
more detail so that anyone with a little daring can perform these adjustments.
So, you DID get the service remote, right? The service remote is crucial to
align the PG. If you do
not have one, stop reading and acquire a remote before continuing. You CANNOT do
anything
with this projector without it. A less desirable but usable alternative is the
use of a PRONTO
remote with the NEC files found on www.remotecentral.com.
Before opening the cover of the projector, from now on referred to as PG,
several conditions must
be met.
A) You should already have an installed screen. (obvious)
B) You have a PG (duh) :)
C) You have either the set-up remote or a pronto with the right file.
D) An input source, preferably DVD with a line doubler for simplicity.
Plain video is not
recommended, since most PG's lack the optional Video decoder card. A Home
theater PC is not
recommended for this procedure, as it is an advanced setup and introduces too
many variables
into the process. However, if you are already familiar with this technology and
know your setup,
go ahead and use it.
E) Tools... A flat and philips head screwdriver are needed, as well as a
razor blade and a soft cloth
or air duster.
F) Coffee. lots of Coffee.
G) An understanding of the controls of the projector and their functions.
The diagrams for the
astigmatism procedure and CRT magnetics layout and function should be on hand.
H) A small ruler for measuring on the CRT face (a wooden ruler works
well).
I) Tape and black thread to mark locations on your screen.
THE DISCLAIMER
This is an advanced and complex procedure for anyone. You should NOT attempt
this if you are
unsure and have NO basic electronics knowledge. This projector CAN KILL YOU! If
you still want
to proceed, please study as much documentation on this unit as possible before
you start this
procedure. You should be familiar with all the parts you will need to adjust and
where they are
located! This procedure, properly done can take a day or more, even for an
expert. It requires a lot
of patience and many back and forth adjustments to achieve the proper results.
If you are not up to
this, get a pro! The NEC's are the most difficult projectors to adjust. You have
been warned! I do
not take responsibility for injury, death, or a broken projector. This is an
advanced and complicated
procedure for the novice.
END OF DISCLAIMER
The PG is a very complicated and very capable machine. Properly adjusted it is
capable of
producing a stunning, film-like image. As with most good things, setting this
unit up takes TIME.
Ok, now that you are already bored reading, let's get on with it then.
The projector should ideally be mounted in its final location, but since this
deals with the
MECHANICAL setup the actual positioning of the PG will likely have to be changed
once the
projector ITSELF is properly aligned. However, the final position will then be
absolutely accurate.

|
|


 NEC PG Series