| Author |
Message |
bachiano
Joined: 13 Mar 2006
Posts: 163
|
| Posted: Fri Oct 28, 2016 6:49 pm Post subject: G70 aspect ratio problem |
|
|
Hi Guys long time.
Im having a problem with my aspect ratio.
All ready tried deleting all my memories.
Did a prelim adjust on P2 without any signal.
synced again to 480p - 720p- 1080i and 1080p.
Pj created new memories.
Same result .
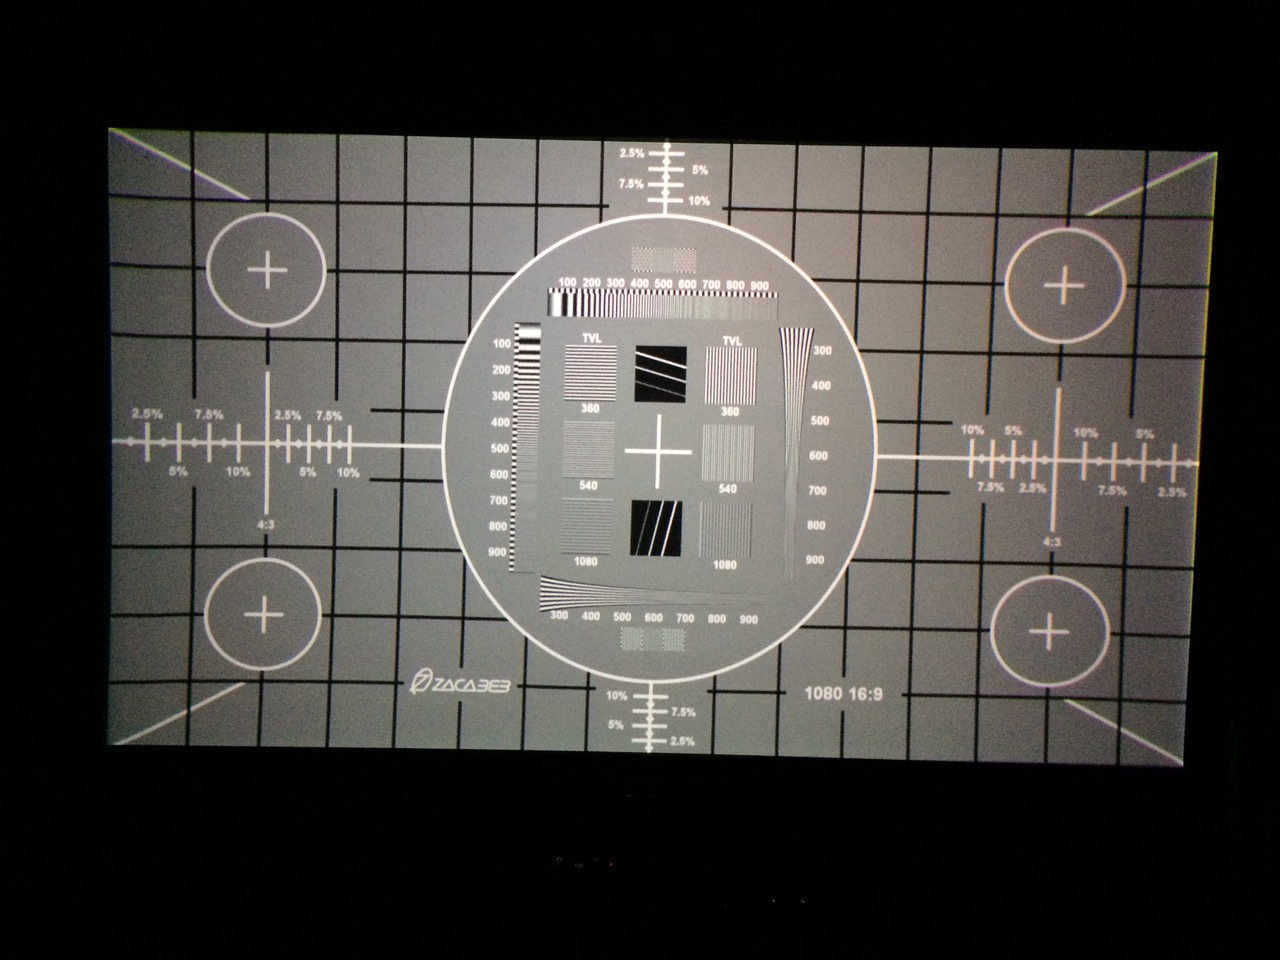
The aspect ratio is stretched vertically.
Here is a pic of the circle.
Any ideas ?
PS. It's been so long you all probably forgot how to even get into the service menu LOL 
| Description: |
|
| Filesize: |
211.96 KB |
| Viewed: |
12835 Time(s) |
|
|
|
| Back to top |
|
 |
jbltecnicspro
Joined: 23 Apr 2016
Posts: 512
|
| Posted: Sat Oct 29, 2016 12:06 pm Post subject: |
|
|
Looks to me like you just need to shrink your image/raster's size vertically a little bit. Sony G70 is one of the weird projectors in which RGB Size control actually controls the raster size as well. Just adjust RGB size and shrink the vertical so that your aspect ratio is correct.
This doesn't need to be done in the service menu. But - to get there - I believe it's ENTER, ENTER, UP, DOWN, ENTER. The set will ask if you want to go into service mode. Hit yes and you're there. Then hit the menu button and you'll see an "S" at the top of the menu indicating that you can now make service adjustments.
|
|
| Back to top |
|
|
bachiano
Joined: 13 Mar 2006
Posts: 163
|
| Posted: Sat Oct 29, 2016 1:01 pm Post subject: |
|
|
If I shrink the image/raster's size vertically.
Then I get black bars at top and bottom of a 16:9 AR screen.
The problem is that the squares toward the center are larger than the once at top and bottom.
and there does not seem to be any way to adjust this and make all the squares the same size.
Scratching my head on this one 
|
|
| Back to top |
|
|
AFryia

Joined: 09 Mar 2006
Posts: 965
Location: S.E. Michigan VPH-G70Q
|
| Posted: Sat Oct 29, 2016 1:07 pm Post subject: |
|
|
| bachiano wrote: | The problem is that the squares toward the center are larger than the once at top and bottom.
and there does not seem to be any way to adjust this and make all the squares the same size.( |
Sounds like you need to adjust the LIN registration setting.
do you see the same effect with internal test patterns as well as external patterns?
_________________
My Volt Blog
|
|
| Back to top |
|
|
jbltecnicspro
Joined: 23 Apr 2016
Posts: 512
|
| Posted: Sat Oct 29, 2016 1:29 pm Post subject: |
|
|
|
Yeah, your linearity (LIN) is probably needing adjustment. If your set is converged (looks to me like it is) then all you need to do is adjust it on Green, which adjusts all of them.
|
|
| Back to top |
|
|
cmjohnson

Joined: 03 Apr 2006
Posts: 5180
Location: Buried under G90s
|
| Posted: Sat Oct 29, 2016 2:32 pm Post subject: |
|
|
Yes, you will get black bars on a 16:9 screen if the displayed image has a shorter ratio and your geometry is right.
We all have to contend with the possibility that some images aren't going to fit perfectly on every screen.
As for linearity adjustments. a large X pattern on the screen is the best way to check linearity. If linearity is off,
the lines of the X will bend. They're going to be straight only when linearity is perfect.
Get a look at the lines as seen from near the edge of the screen so you can see the bends better.
|
|
| Back to top |
|
|
bachiano
Joined: 13 Mar 2006
Posts: 163
|
| Posted: Sat Oct 29, 2016 2:35 pm Post subject: |
|
|
I'll play around with lin but I don't think that will do it as lin is for balancing the top and bottom.
But I'll try.
"do you see the same effect with internal test patterns as well as external patterns? "
Good question I'll have to check,
I'll take some more pics as well.
Thanks
|
|
| Back to top |
|
|
bachiano
Joined: 13 Mar 2006
Posts: 163
|
| Posted: Sat Oct 29, 2016 5:41 pm Post subject: |
|
|
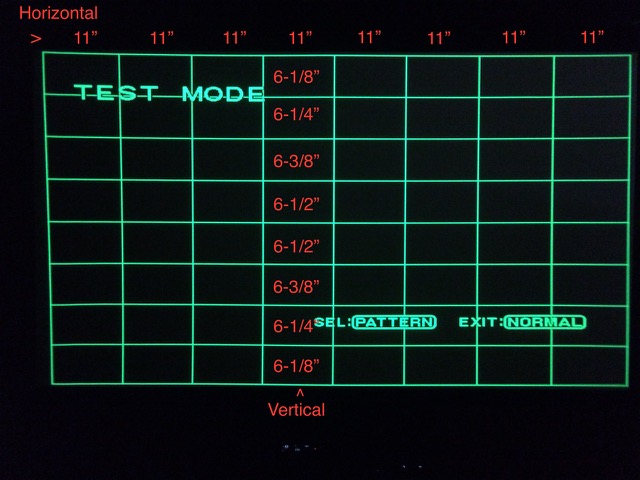
I checked the internal pattern and it shows the same issue.
Below is the internal Hatch (9x9) test pattern of my G70.
Feeding 1080p
Ive overlaid measurements so you guys can see the discrepancy.
The length of the vertical squares should all be the same, but they are not.
They are longer in the center and progressively get shorter toward the top and bottom edges.
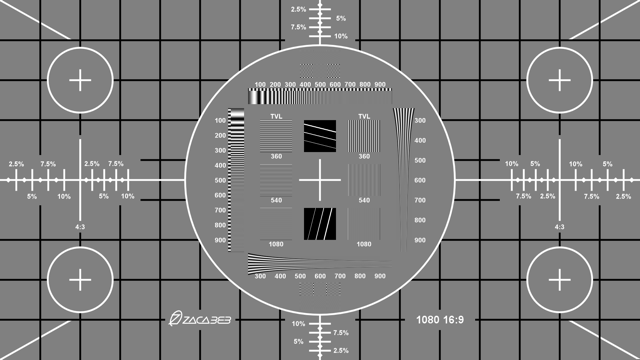
And below that is the Actual .png from ecrabbs 1920X1080 (not from the PJ)
So you can compare and see what the geometry should really look like.
------------
So now that we've determined that the internal test pattern also shows the same issue.
It appears the Problem is within the PJ and not any outside source issue ? Right ?
Weird....
| Description: |
|
| Filesize: |
75.97 KB |
| Viewed: |
12653 Time(s) |
|
| Description: |
|
| Filesize: |
42.79 KB |
| Viewed: |
12653 Time(s) |
|
Last edited by bachiano on Sun Oct 30, 2016 3:25 am; edited 3 times in total
|
|
| Back to top |
|
|
AFryia
Joined: 09 Mar 2006
Posts: 965
Location: S.E. Michigan VPH-G70Q
|
| Posted: Sat Oct 29, 2016 5:50 pm Post subject: |
|
|
Could also be too much Zone adjustment.
I always rest Zone to 128 and perform all the registration setup. After everything is said and done I use zone sparingly to tweak the final geometry.
_________________
My Volt Blog
|
|
| Back to top |
|
|
bachiano
Joined: 13 Mar 2006
Posts: 163
|
| Posted: Sat Oct 29, 2016 7:33 pm Post subject: |
|
|
I also use zone sparingly but I'll check.
I usually only need a couple of click after doing the big stuff.
|
|
| Back to top |
|
|
bachiano
Joined: 13 Mar 2006
Posts: 163
|
| Posted: Sat Oct 29, 2016 7:41 pm Post subject: |
|
|
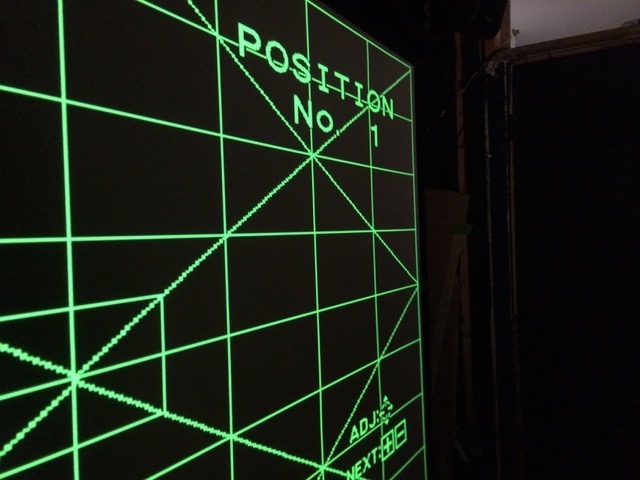
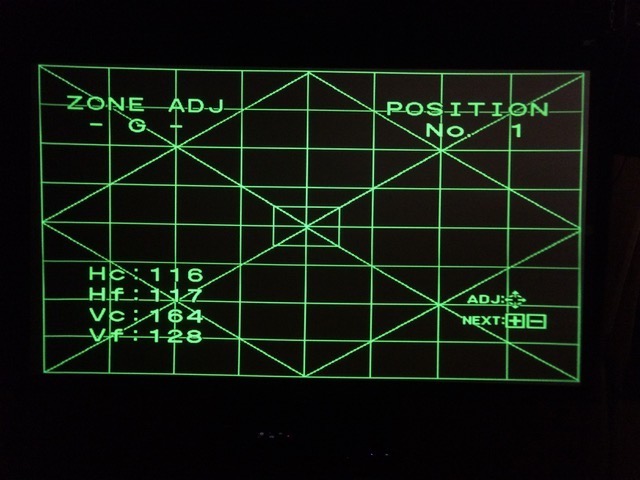
Here is the x pattern from zone.
Can't tell much head on, but the diagonals are definitely curving.
| Description: |
|
| Filesize: |
70.91 KB |
| Viewed: |
12724 Time(s) |
|
| Description: |
|
| Filesize: |
72.46 KB |
| Viewed: |
12724 Time(s) |
|
|
|
| Back to top |
|
|
jbltecnicspro
Joined: 23 Apr 2016
Posts: 512
|
| Posted: Sat Oct 29, 2016 8:20 pm Post subject: |
|
|
|
I see some pincushioning, but nothing I'd get too upset over. Which diagonals are you referring to? The ones at the corners of the screen? Or do you mean the diagonals from center to the outer edge?
|
|
| Back to top |
|
|
bachiano
Joined: 13 Mar 2006
Posts: 163
|
| Posted: Sat Oct 29, 2016 8:59 pm Post subject: |
|
|
|
Diagonals from the center, but it's all good now. It's fixed.
|
|
| Back to top |
|
|
jbltecnicspro
Joined: 23 Apr 2016
Posts: 512
|
| Posted: Sat Oct 29, 2016 9:05 pm Post subject: |
|
|
|
What did you end up doing to fix it?
|
|
| Back to top |
|
|
bachiano
Joined: 13 Mar 2006
Posts: 163
|
| Posted: Sat Oct 29, 2016 9:08 pm Post subject: |
|
|
Hi guys
Success !!! 
I now have a perfect 40 x 40 circle.
I set all Zone to 128 and that fixed the issue.
I dont really understand why that would have made a difference as I checked before resetting to 128 and I was almost at 128 on all zones - no more than 5 clicks from 128.
Anyway Im not going to complain.
I wonder if over time, zone adjustments compound over previous zone adjustments?
and the new numbers don't reflect the compounded adjustments ? Hope that makes sense ?
Thank you all for all the help.
Im very grateful there are some wise old timers still around.
Special thanks to AFryia since he hit the nail on the head.
Thanks
Bachiano
P.S. Glad Curt didnt show up telling me I needed a new board - lol - Just kidding Curt
| Description: |
|
| Filesize: |
58.96 KB |
| Viewed: |
12691 Time(s) |

|
|
|
| Back to top |
|
|
bachiano
Joined: 13 Mar 2006
Posts: 163
|
| Posted: Sat Oct 29, 2016 9:13 pm Post subject: |
|
|
Just had to put another Smiley cause I feel like it 
Thanks Again ! 
|
|
| Back to top |
|
|
cmjohnson
Joined: 03 Apr 2006
Posts: 5180
Location: Buried under G90s
|
| Posted: Sat Oct 29, 2016 11:22 pm Post subject: |
|
|
|
No, zone adjustments don't stack on top of each other. Allowing for component drift due to ageing, a given adjustment number should always be the same amount of adjustment and in the same way.
|
|
| Back to top |
|
|
bachiano
Joined: 13 Mar 2006
Posts: 163
|
| Posted: Thu Nov 10, 2016 6:07 pm Post subject: |
|
|
Hi Guys.
Back again.
I still have the vertical aspect ratio problem
It seems resolution related.
At 480p the vertical linearity is not perfect but manageable.
As one goes up in resolution the problem gets worse.
At 1080p I have to throw away (overscan) 2.5% on both edges of the Horizontal image in order to get my circle round.
Any thoughts ?
Thanks
Bachiano
|
|
| Back to top |
|
|
bachiano
Joined: 13 Mar 2006
Posts: 163
|
| Posted: Thu Nov 10, 2016 9:16 pm Post subject: |
|
|
Just realized that stretching the image horizontally does not fix the issue.
Stretching the image horizontally only makes the circle round but does not get rid of the vertical un-linearity.
To be clear, I'm using the word linearity not as in left and right and up and down linearity.
But as in the distances between the rectangles on the 9x9 hatch internal pattern.
The rectangles are shorter towards the top and bottom edged and longer towards the center of the screen.
Per my previous pic with the measurements.
Hope that makes sense.
BTW this issue shows up with out a signal.
Ive also tried switching from input B (moome internal HDMI v3 card) to input A ( moome external RGB to DVI card) Issue remains
Im now seriously thinking the problem is in the PJ and nothing to do with the signal.
Maybe a bad cap or resistor ???
The last thing it could be would be the PS3 (unlikely) but Ill see if I can borrow a BD player to double check.
I've researched this to death and I don't think I've found a single person ever having this issue.
This is a strange one.
Thanks
|
|
| Back to top |
|
|
Curt Palme
CRT Tech
Joined: 08 Mar 2006
Posts: 24396
Location: Langley, BC
TV/Projector: All of them!
|
| Posted: Fri Nov 11, 2016 9:15 pm Post subject: |
|
|
It may be parts aging, it may be relatively normal.
I had a G90 about 10 years ago that had one area just left of center that simply wouldn't converge the red properly. It was out by about 1/2 test pattern line thickness. I've never had another G90 do that, every other one was perfect, except for that one.
I see your complaint, but short of starting to swap out boards (at random, as I have no idea what's causing this), you may be stuck with it.
|
|
| Back to top |
|
|
|
|


