 |
||||||||||||
| Home |
|
Products For Sale |
FAQs, Tips, Manuals |
Referral List |
|
Photo Gallery |
|
Links |
|
Contact Us |
|
|
|||||||||||||||||||||||||
Now screw down the 4 ground wires as shown above. Route the G2 and focus wires to the CRT’s and connect. Connect the mid-air connection of the focus feed from the HV board to the focus block.
Congratulations! You’ve now installed the focus block. As for the proper adjustment of the 6 controls. The three focus controls are self explanatory. Once the screen (G2 controls) are set properly, set the focus controls for the best focus. Use sunglasses and look into each lens at the tube face to get the best electronic focus. Then touch up the lens focusing wing nuts for best optical focusing. To set the G2 controls, you can do this in a number of ways. I prefer using the AVIA test disc. With the G2 controls at minimum, turn the set on, and confirm that the HV crackle can be heard as the set turns on. The set should now be running. Let the set warm up for a good 5 minutes, and connect a signal to the video input jack. Assuming that you have the AVIA disc, select the ‘stepped gray scale’ out of the test patterns. Turn up each screen control about ¼ turn so that light is emitting from each tube. While either looking at the screen or into the tubes, ensure that the menu brightness and contrast (picture) settings are at the factory default, or a couple of notches about the ½ way point. Now, using the stepped gray scale test pattern, look into each lens with sunglasses, and adjust the appropriate screen control so that the darkest bar (0 IRE) is barely lit up, with a low enough light level so that it does not show on the screen. When each tube is adjusted equally, you should have a decent gray scale showing on the screen. That does it! Due to slight variances in each focus block, you might need to touch up the convergence controls of the set.
|
|
||||||||||||||||||||||||
© Copyright CurtPalme.com. All Rights Reserved. |

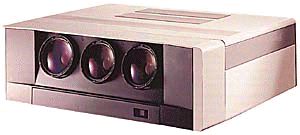
 Zenith PRO 841x/851x


