CurtPalme.com Home Theater sales, calibration, service, and discussion forum. Hundreds of free manuals & setup tips.


Sign up and receive the latest newsletters by email!     Join the Forum discussions!    
    Site Map  
Home Products
For Sale
Referral
List
Photo
Gallery
Links Contact
Us
CRT Primer
Troubleshooting Tips
Mounting Methods
Definitive CRT
Projector Setup Guide
Tube/Raster Setup
Tube Condition (Wear)
Projector
Specifications
Projector Rankings
Video Processors
Ampro 1500/2000
Ampro 2300/2600
Ampro 3600/4600
Barco (Older Analog)
Barco 70x/Cine7  
Barco 500/800/801
Barco 808/Cine8
Barco 120x/Cine9
Dwin 500/700
Electrohome ECP 
Electrohome Marquee 
Mitsubishi
NEC PG
NEC XG
Panasonic 108x
Runco
Seleco
Sony 10xx
Sony 125x/127x
Sony 1292
Sony D50
Sony G70
Sony G90
Zenith 841/851
Zenith 895/900
Zenith 1200

Building a Hushbox (Alternate Solution)

 (Page 7)

Back to Advanced Procedures Index

Page:
1 2 3 4 5 6 7 8


Fig. 30 shows the hushbox painted and installed (“wings” still to be installed, notice the steel ceiling mount structure sticking out of the hushbox).


Figure 30

Fig. 31 shows the 2 left side fans cooling the blue tube (notice the blue line on the right edge of the left fan. That is the blue CRT face).
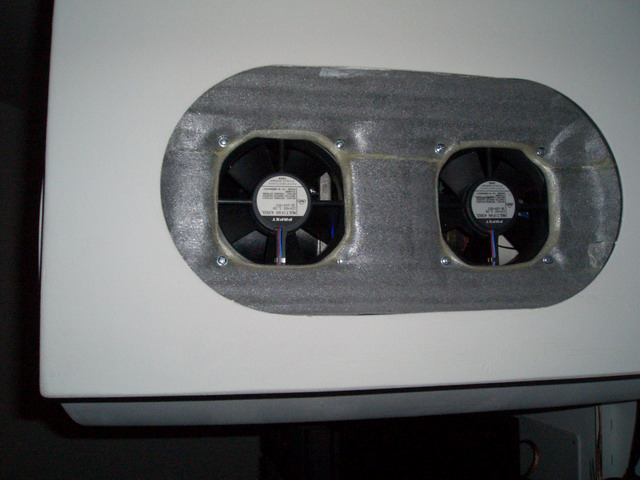

Figure 31

Fig. 32 shows the front most right side fan cooling the red tube (notice the red line on the left edge of the fan. That is the red CRT face).


Figure 32

Fig. 33 & Fig. 34 show respectively the structure beneath the hushbox and the hushbox with the “wings” (side panels) fitted onto it.


Figure 33


Figure 34

The “wings” are fixed by means of wooden pins that go on the side of the hushbox. Then the other end is hold onto the ceiling by means of steel bands that are bent in the middle so that a flat steel part can slide in.


... Previous Page

Next Page ...


© Copyright CurtPalme.com. All Rights Reserved.